[vc_column_text pb_margin_bottom=”no” pb_border_bottom=”no” width=”3/4″ el_position=”first last”]
The Four Stages of an SMP Survey
From design to completion.
SMP Online Survey Software is designed with 4 status levels that control the stages that your surveys typically move through from first being created, to collecting data, to finally being closed. The stages of an SMP survey are:
- Design Mode – This is where you create your questions, set up the routing logic and input your quota structures, and add other features that might be neccesary for this survey such as exit links or your own design of survey close and screen outs, back button and save and exit button toggles, total quotas, cookie completion control and many other features. Once this stage is complete you are ready to move to..,
- Test Mode – In this mode you can test the survey either by completing it yourself, sending it to colleagues or running the automated ‘Testbot’ feature. The “testbot” feature will generate test survey for you by running the survey in real time. Just set it running and move onto something else while it completes its run. It is a great way to test the logic and quota controls that you have programmed. Once tested you move to..,
- Deploy Mode – In this mode the real data is collected as a response to your sample of respondents completing the survey. In this mode the “Monitor” page is live and trackes the surveys completion rate across the quotas set, allows you to modify the quotas if required, displays “Reports” as an analysis of the data and allows you to download the data at any time so you can begin analysis or creating code frames for your open-ended questions.
- Close Mode – When you have collected enough surveys or the quota is full then you can go ahead and close the survey. No more respondents can answer the survey when it is in this mode. Note that you can re-open the survey at any time but the original quotas are reset to zero. You can re-configure the quotas to any new requirement in the “Monitor” survey page.
To put your survey into the ‘Deploy Mode” mode you have to first put it into “Test mode”. If you have finished with designing your survey and are ready to test it click your survey over to “Test mode” by clicking on the “Test Mode” button – circled below.

Once in “Test Mode” you can now test the survey to verify that all is working as expected. The easiest way to do this is to press the ‘Testbot’ button – shown circled below. This will generate a number of dummy surveys for you – depending on how many times you decide to run it.

Once this has finished running you can then extract this test data set into Excel and check that your skips, quotas, screen outs etcetera are working as programmed.
Note that when you deploy the survey none of this test data will be saved.
From the “Test mode” status you are then able to select the “Deploy survey” mode button which will put your survey into deploy mode. Press the “Deploy survey” mode button shown circled below.

The icon will change to that shown below and the survey is now ready for you to send out to your invites and begin collecting your data.

There are now a number of options available to you to send out your survey invites. These options will be covered in “Deploying your surveys 102”.
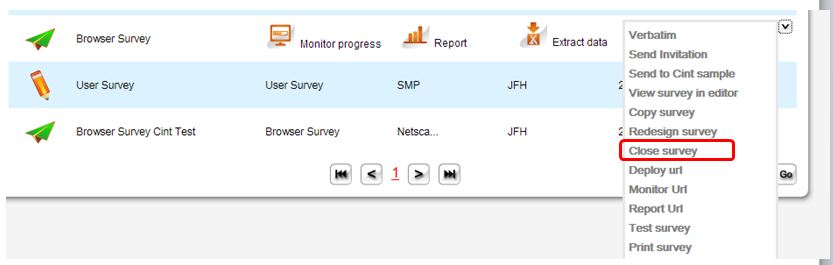
When your survey collection period is complete and it is time to close the survey you do this by clicking on the “Close survey” option from the drop down list shown in the image below.
 The survey status will now be “Closed” and no more data will be collected for it. The following icon will be displayed next to that survey.

Note that it is possible to move back into earlier modes but to do so means that the data you have already collected will be archived and not be a part of the final data set until you manually put them back together. This is because by changing a survey that you have launched you are potentially changing the data structure and as they are now different you are creating different data sets.
However it is a fairly simple step for anyone familiar with either MS Excel or MS Access to strip the datasets together again if that is necessary.
Author: John Hughes
Comments welcome at: jhughes@smpsurveys.com
[/vc_column_text]